2010年3月24日 星期三

Android學習筆記 - 讀取手機電話簿(PhoneBook)

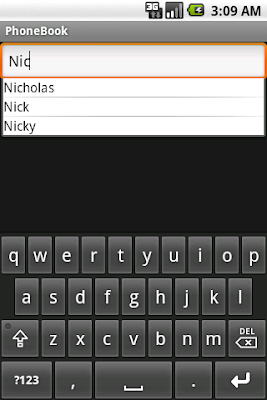
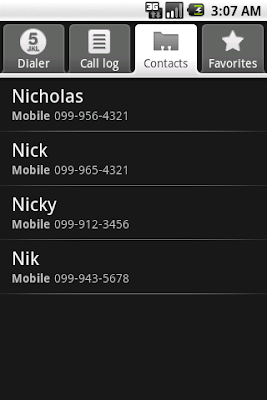
1. 此範例是自動填入文字(AutoCompleteTextView)功能來搜尋電話簿內的聯絡人姓名。

2. 由於我們需取得目前手機的電話簿,因此必需在AndroidManifest.xml內新增一個讀取電話簿的權限。

3. MainActivity.java
package org.me.android_phonebook;
import android.app.Activity;
import android.content.ContentResolver;
import android.database.Cursor;
import android.os.Bundle;
import android.provider.Contacts;
import android.widget.ArrayAdapter;
import android.widget.AutoCompleteTextView;

public class MainActivity extends Activity {
    private AutoCompleteTextView autoComplete;

    @Override
    public void onCreate(Bundle icicle) {
        super.onCreate(icicle);
        setContentView(R.layout.main);
        autoComplete = (AutoCompleteTextView) findViewById(R.id.autoComplete);
        //設定自動填入的文字內容
        ArrayAdapter adapter = new ArrayAdapter(this,android.R.layout.simple_spinner_item,getContactsName());
        autoComplete.setAdapter(adapter);
    }

    //取得所有聯絡人姓名
    public String[] getContactsName() {
        //取得內容解析器
        ContentResolver contentResolver = this.getContentResolver();
        //設定你要從電話簿取出的欄位
        String[] projection = new String[]{Contacts.People.NAME,Contacts.People.NUMBER};
        //取得所有聯絡人
        Cursor cursor = contentResolver.query(Contacts.People.CONTENT_URI, projection, null, null, Contacts.People.DEFAULT_SORT_ORDER);
        String[] contactsName = new String[cursor.getCount()];
        for (int i = 0; i < cursor.getCount(); i++) {
            //移到指定位置
            cursor.moveToPosition(i);
            //取得第一個欄位
            contactsName[i] = cursor.getString(0);
        }
        return contactsName;
    }
}
4. AndroidManifest.xml
<?xml version="1.0" encoding="UTF-8"?>
<manifest xmlns:android="http://schemas.android.com/apk/res/android"
     package="org.me.android_phonebook">
    <application>
         <activity android:name=".MainActivity" android:label="PhoneBook">
            <intent-filter>
                <action android:name="android.intent.action.MAIN"/>
                <category android:name="android.intent.category.LAUNCHER"/>
            </intent-filter>
        </activity>
    </application>
    <uses-permission android:name="android.permission.READ_CONTACTS"></uses-permission>
</manifest>
5. main.xml(Layout)
<?xml version="1.0" encoding="UTF-8"?>
<LinearLayout xmlns:android="http://schemas.android.com/apk/res/android"
    android:orientation="vertical"
    android:layout_width="fill_parent"
    android:layout_height="fill_parent">" 
    <AutoCompleteTextView
        android:id="@+id/autoComplete"
        android:layout_width="fill_parent"
        android:layout_height="50px">
    </AutoCompleteTextView>
</LinearLayout>
6. 執行之後的畫面。

2010年3月23日 星期二

Android學習筆記 - 通話狀態(PhoneState)

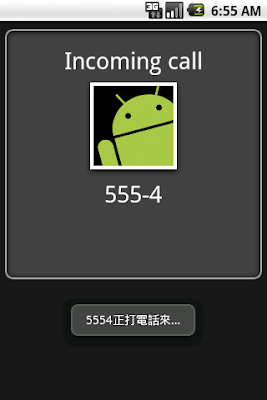
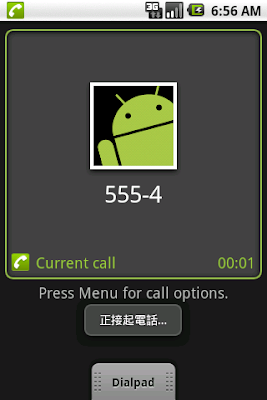
1. 利用繼承PhoneStateListener來實作當通話狀態為閒置、接起或響起時我們所要做的動作。

2. 由於我們需取得目前手機的通話狀態,因此必需在AndroidManifest.xml內新增一個讀取通話狀態的權限。

3. MainActivity.java
package org.me.android_callstate;
import android.app.Activity;
import android.content.Context;
import android.os.Bundle;
import android.telephony.PhoneStateListener;
import android.telephony.TelephonyManager;
import android.widget.Toast;

public class MainActivity extends Activity {

    @Override
    public void onCreate(Bundle icicle) {
        super.onCreate(icicle);
        setContentView(R.layout.main);
        //電話狀態的Listener
        MyPhoneStateListener myPhoneStateListener = new MyPhoneStateListener();
        //取得TelephonyManager
        TelephonyManager telephonyManager = (TelephonyManager) getSystemService(Context.TELEPHONY_SERVICE);
        //將電話狀態的Listener加到取得TelephonyManager
        telephonyManager.listen(myPhoneStateListener, PhoneStateListener.LISTEN_CALL_STATE);
    }

    public class MyPhoneStateListener extends PhoneStateListener {
        @Override
        public void onCallStateChanged(int state, String phoneNumber) {
            switch (state) {
                //電話狀態是閒置的
                case TelephonyManager.CALL_STATE_IDLE:
                    break;
                //電話狀態是接起的
                case TelephonyManager.CALL_STATE_OFFHOOK:
                    Toast.makeText(MainActivity.this, "正接起電話…", Toast.LENGTH_LONG).show();
                    break;
                //電話狀態是響起的
                case TelephonyManager.CALL_STATE_RINGING:
                    Toast.makeText(MainActivity.this, phoneNumber + "正打電話來…", Toast.LENGTH_LONG).show();
                    break;
                default:
                    break;
            }
        }
    }
}


4. AndroidManifest.xml
<?xml version="1.0" encoding="UTF-8"?>
<manifest xmlns:android="http://schemas.android.com/apk/res/android"
     package="org.me.android_callstate">
    <application>
         <activity android:name=".MainActivity" android:label="MainActivity">
            <intent-filter>
                <action android:name="android.intent.action.MAIN"/>
                <category android:name="android.intent.category.LAUNCHER"/>
            </intent-filter>
        </activity>
    </application>
    <uses-permission android:name="android.permission.READ_PHONE_STATE"></uses-permission>
</manifest>


4. 執行之後的畫面。


Android學習筆記 - 畫廊(Gallery)

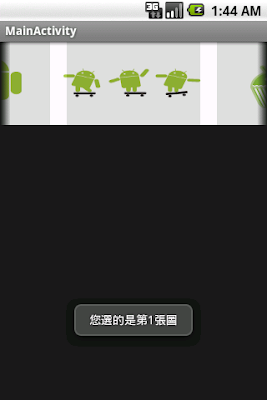
1. 使用Gallery Widget來達到畫廊的效果。

2. 需建立一個繼承BaseAdapter的物件來放置你要呈現的圖片。

3. MainActivity.java
package org.me.android_gallery;
import android.app.Activity;
import android.os.Bundle;
import android.view.View;
import android.widget.AdapterView;
import android.widget.AdapterView.OnItemClickListener;
import android.widget.Gallery;
import android.widget.Toast;

public class MainActivity extends Activity {
    @Override
    public void onCreate(Bundle icicle) {
        super.onCreate(icicle);
        setContentView(R.layout.main);
        Gallery gallery = (Gallery) findViewById(R.id.gallery);
        ImageAdapter imageAdapter = new ImageAdapter(this);
        //設定圖片來源
        Integer[] mImageIds = {
            R.drawable.android_logo,
            R.drawable.androids,
            R.drawable.cupcake_2009,
            R.drawable.donut_2009,
            R.drawable.eclair_2009
        };
        //設定圖片的位置
        imageAdapter.setmImageIds(mImageIds);
        //圖片高度
        imageAdapter.setHeight(100);
        //圖片寬度
        imageAdapter.setWidth(200);
        gallery.setAdapter(imageAdapter);
        gallery.setOnItemClickListener(new OnItemClickListener(){
            public void onItemClick(AdapterView parent, View view, int position, long id) {
                Toast.makeText(MainActivity.this, "您選的是第"+position+"張圖", Toast.LENGTH_LONG).show();
            }
        });
    }
}

4. ImageAdapter.java
package org.me.android_gallery;
import android.content.Context;
import android.view.View;
import android.view.ViewGroup;
import android.widget.BaseAdapter;
import android.widget.Gallery;
import android.widget.ImageView;

public class ImageAdapter extends BaseAdapter {
    private Context mContext;
    private Integer width;
    private Integer height;
    private Integer[] mImageIds;

    public ImageAdapter(Context c) {
        mContext = c;
    }

    public View getView(int position, View convertView, ViewGroup parent) {
        ImageView imageView = new ImageView(mContext);
        //設定圖片來源
        imageView.setImageResource(mImageIds[position]);
        //設定圖片的寬、高
        imageView.setLayoutParams(new Gallery.LayoutParams(width, height));
        imageView.setScaleType(ImageView.ScaleType.FIT_XY);
        return imageView;
    }

    public Integer getHeight() {
        return height;
    }

    public void setHeight(Integer height) {
        this.height = height;
    }

    public Integer[] getmImageIds() {
        return mImageIds;
    }

    public void setmImageIds(Integer[] mImageIds) {
        this.mImageIds = mImageIds;
    }

    public Integer getWidth() {
        return width;
    }

    public void setWidth(Integer width) {
        this.width = width;
    }

    public int getCount() {
        return mImageIds.length;
    }

    public Object getItem(int position) {
        return position;
    }

    public long getItemId(int position) {
        return position;
    }
}


5. main.xml(Layout)
<?xml version="1.0" encoding="UTF-8"?>
<LinearLayout xmlns:android="http://schemas.android.com/apk/res/android"
    android:orientation="vertical"
    android:layout_width="fill_parent"
    android:layout_height="fill_parent">
    <Gallery
        android:id="@+id/gallery"
        android:layout_width="fill_parent"
        android:layout_height="wrap_content">
    </Gallery>
</LinearLayout>


4. 執行之後的畫面。


2010年3月15日 星期一

Google Map 查詢地址及經緯度

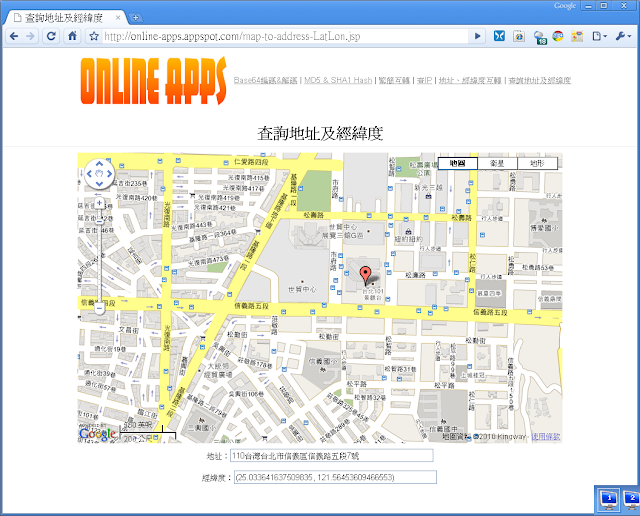
Google Map 查詢地址及經緯度,主要是在Google Map上利用移動標示位置來取得標示位置的地址及經緯度。


線上地址、經緯度互轉

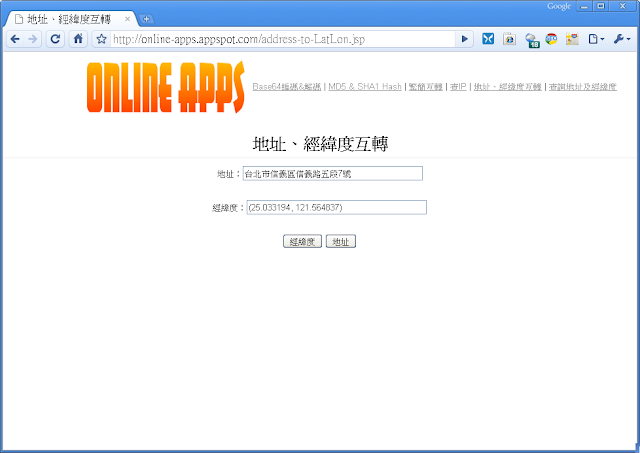
線上地址、經緯度互轉,利用地址查詢此地址的經緯度或是使用經緯度來查詢相對映的地址


線上MD5 & SHA1 Hash

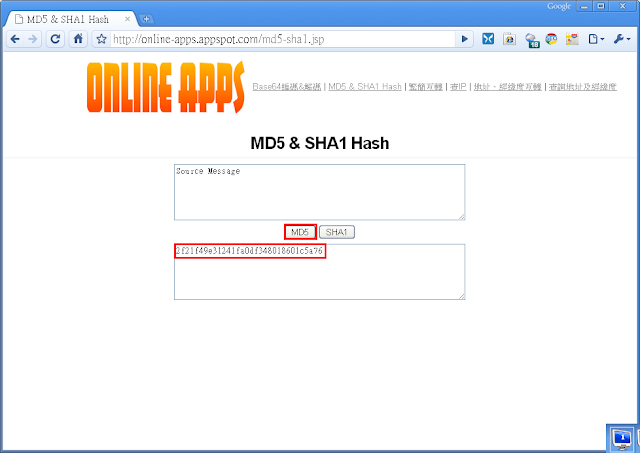
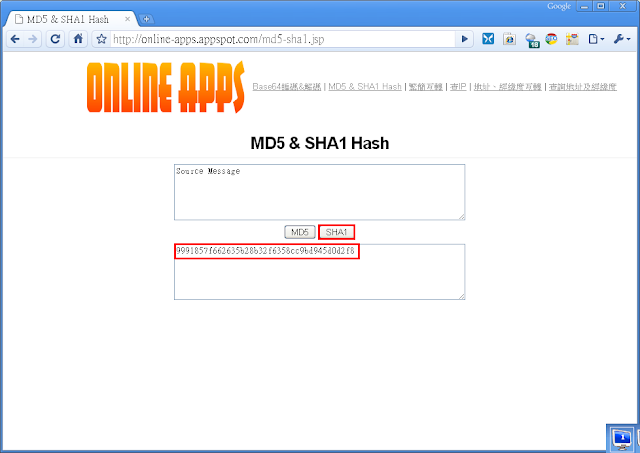
線上MD5 & SHA1 Hash,不過只能進行文字的Hash,無法針對檔案做Hash。

1. MD5 Hash


2. SHA1 Hash


2010年3月11日 星期四

線上Base64編碼與解碼

介紹一個線上Base64編碼與解碼的網頁…

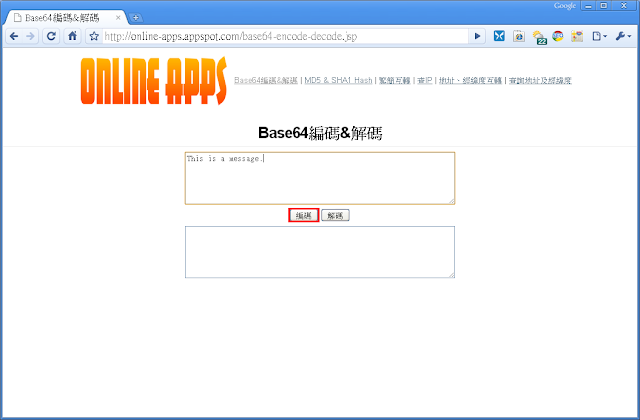
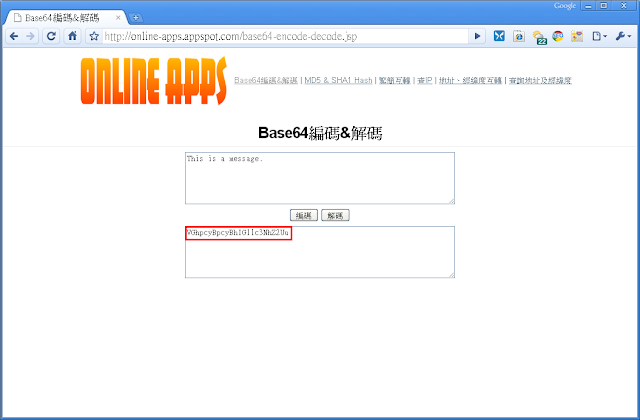
1. Base64編碼
    輸入欲編碼的字串,再按下編碼按鈕,就會顯示編碼後的結果


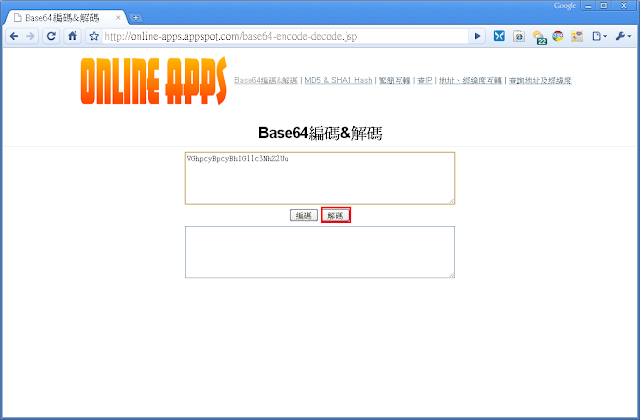
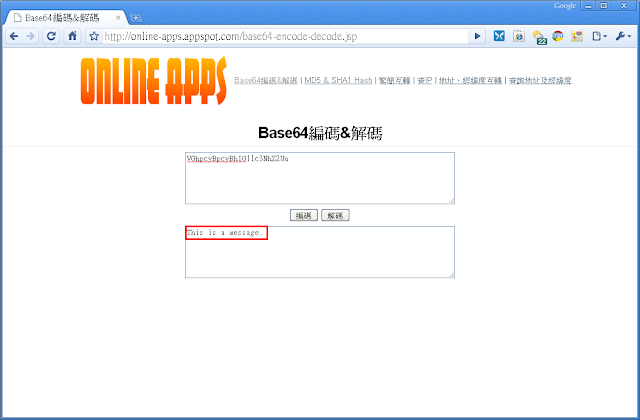
2. Base64解碼
    輸入欲解碼的字串,再按下解碼按鈕,就會顯示解碼後的結果


2010年3月8日 星期一

First & Second conditionals

1. First Conditional (For future)
   Conditional cause(If+Simple Present)  Main clause(will+v.)
   ex. If there are a lot of cars on the stree, I will take MRT.
    
2. Second Conditional (Imagine)
   Conditional cause(If+Simple Past)  Main clause(model verbs+v.)
   ex. If I won the lottery, I could buy a car.
   Model vers : would, could, might


2010年3月3日 星期三

Java AES Encrypt & Decrypt Example(加解密)

範例程式
//欲加密的字串
String msg = "This is a message.";
System.out.println("原始字串:"+new String(msg));
//設定要使用的加密演算法
KeyGenerator keyG = KeyGenerator.getInstance("AES");
//設定key的長度
keyG.init(256);
//產生SecretKey
SecretKey secuK = keyG.generateKey();
//取得要用來加密的key(解密也需使用這把key)
byte[] key = secuK.getEncoded();
System.out.println("key:"+new String(key));
SecretKeySpec spec = new SecretKeySpec(key, "AES");
Cipher cipher = Cipher.getInstance("AES");
//設定為加密模式
cipher.init(Cipher.ENCRYPT_MODE, spec);
//將字串加密,並取得加密後的資料
byte[] encryptData = cipher.doFinal(msg.getBytes());
System.out.println("加密後字串:"+new String(encryptData));

//使用剛剛用來加密的key進行解密
spec = new SecretKeySpec(key, "AES");
cipher = Cipher.getInstance("AES");
//設定為解密模式
cipher.init(Cipher.DECRYPT_MODE, spec);
byte[] original = cipher.doFinal(encryptData);
System.out.println("解密後字串:"+new String(original));

輸出結果
原始字串:This is a message.
key:�U{� jPk ���@7 .�A@��&]W LK���ݣ
加密後字串:��� � ����tl7Q U!���d�{4R) �� .
解密後字串:This is a message.


2010年3月2日 星期二

Java date to string(日期轉字串)

Java 日期轉字串範列
//目前時間
Date date = new Date();
//設定日期格式
SimpleDateFormat sdf = new SimpleDateFormat("yyyy-MM-dd HH:mm:ss");
//進行轉換
String dateString = sdf.format(date);
System.out.println(dateString);


輸出結果
2010-03-02 19:15:57


Java string to date(字串轉日期)

Java字串轉日期範例
//欲轉換的日期字串
String dateString = "20010-03-02 20:25:58";
//設定日期格式
SimpleDateFormat sdf = new SimpleDateFormat("yyyy-MM-dd HH:mm:ss");
//進行轉換
Date date = sdf.parse(dateString);
System.out.println(date);

輸出結果
Tue Mar 02 20:25:58 CST 20010


Java string split(字串切割)

Java字串切割範例
//欲切割的字串
String splitString = "Bob:Stev:David:John";
//使用「:」進行切割
String[] names = splitString.split(":");
for(String name:names){
    System.out.println(name);
}

輸出結果
Bob
Stev
David
John


Java int to String(整數轉字串)

1. String stringValue = Integer.toString(12345);

2. String stringValue = String.valueOf(12345);

3. String stringValue = new String(""+12345);


Java string to int(字串轉整數)

1. int intValue = Integer.valueOf("12345");

2. int intValue = Integer.parseInt("12345");


android三兩事

android三兩事為Android相關文章的簡體版…


有興趣的人可以上去看看…